Take the Mood Sense test
How to
Saliva can be tricky. For that reason, we have these instructions that you should follow exactly in order to get a good, clear result. Test strips should always be stored in a cool, dry environment and protected from light until use.
NOTE: Test Device, Silicone Thimble, and Droppers are all reusable and should be cleaned at the end of testing for reuse. Larger kits will have an extra dropper.
It’s best to do the test first thing in the morning after you wake up.

Prep
Make sure the device is dry first!
Open the test device lid and insert a new test strip so that the white paper side is under the circular hole.
Close the lid and press on the + and - mark to click the lid in place.
You should be able to see the red and blue lines in the window.
Insert new test strip

Step 1
Brush your teeth (every surface) and tongue, with a clean toothbrush and water.
Rinse vigorously with water, 2 times.
Wait 5 minutes before moving on.
If you used toothpaste while brushing wait 30 minutes.
Brush teeth and rinse (water only)
Step 2
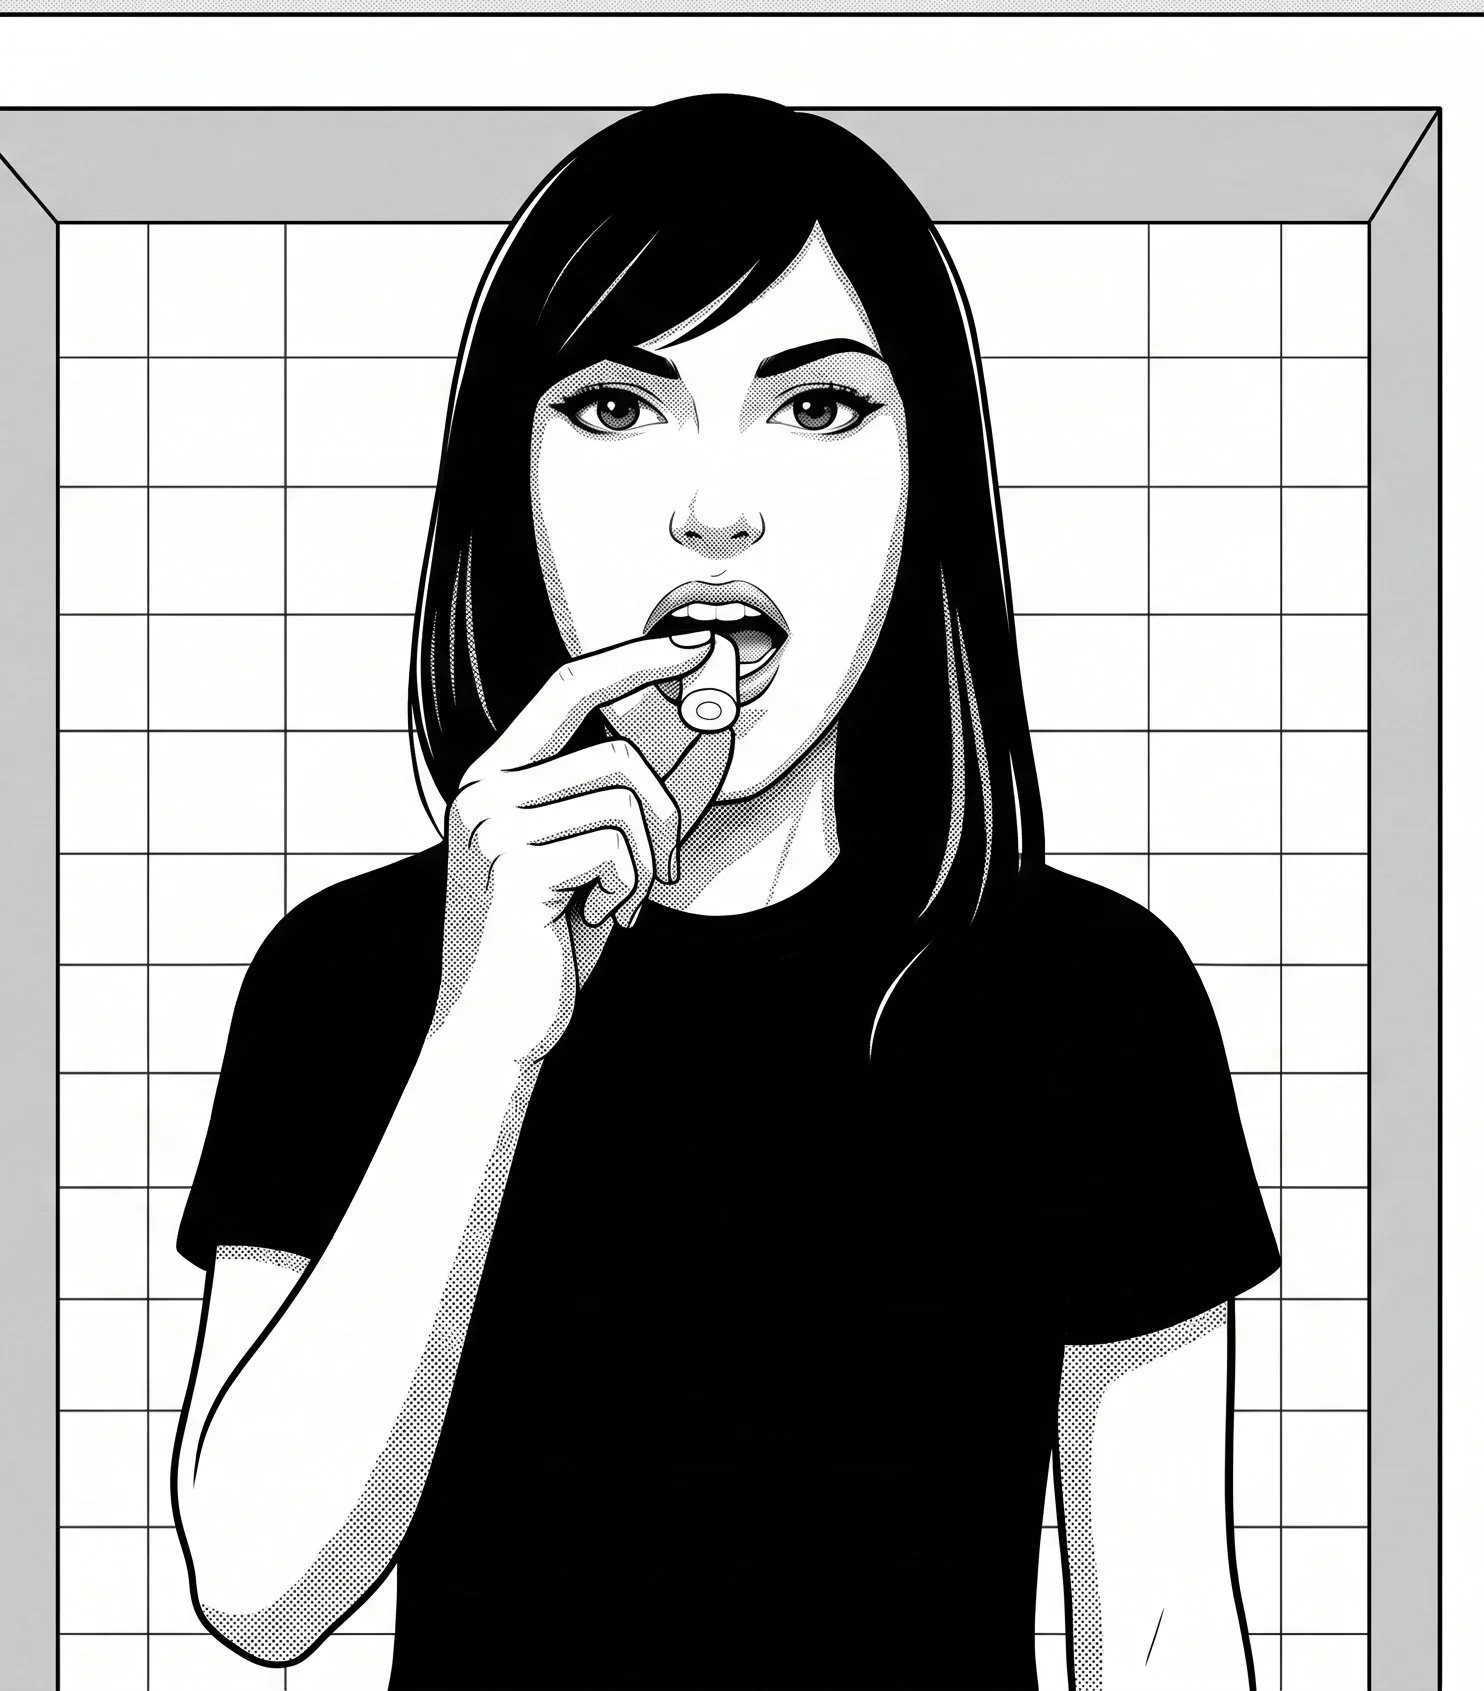
Lightly chew on the dental gauze for 1-2 minutes.
The gauze should be saturated with saliva.
*It may help to place the gauze under your tongue and tilt your head forward.
Lightly chew on dental gauze
Step 3
Insert the dental gauze into the silicone thimble.
Squeeze until saliva pools closer to the top.
Collect saliva using the dropper
Tilt the dropper, open-end up and squeeze until air bubbles have been released.
Collect Saliva

Step 4
Drop 3 drops into the circle well. For best results wait 3-5 seconds between each drop.
Wait about 20 minutes, or until the saliva has reached the opposite end (yellow marker). If after 20 minutes it hasn’t reached the yellow marker, add one more drop of saliva and wait an additional 10 minutes.
(NOTE: Video shown below is faster than real life)
Run Test
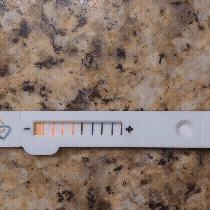
Before test is run (shown below)

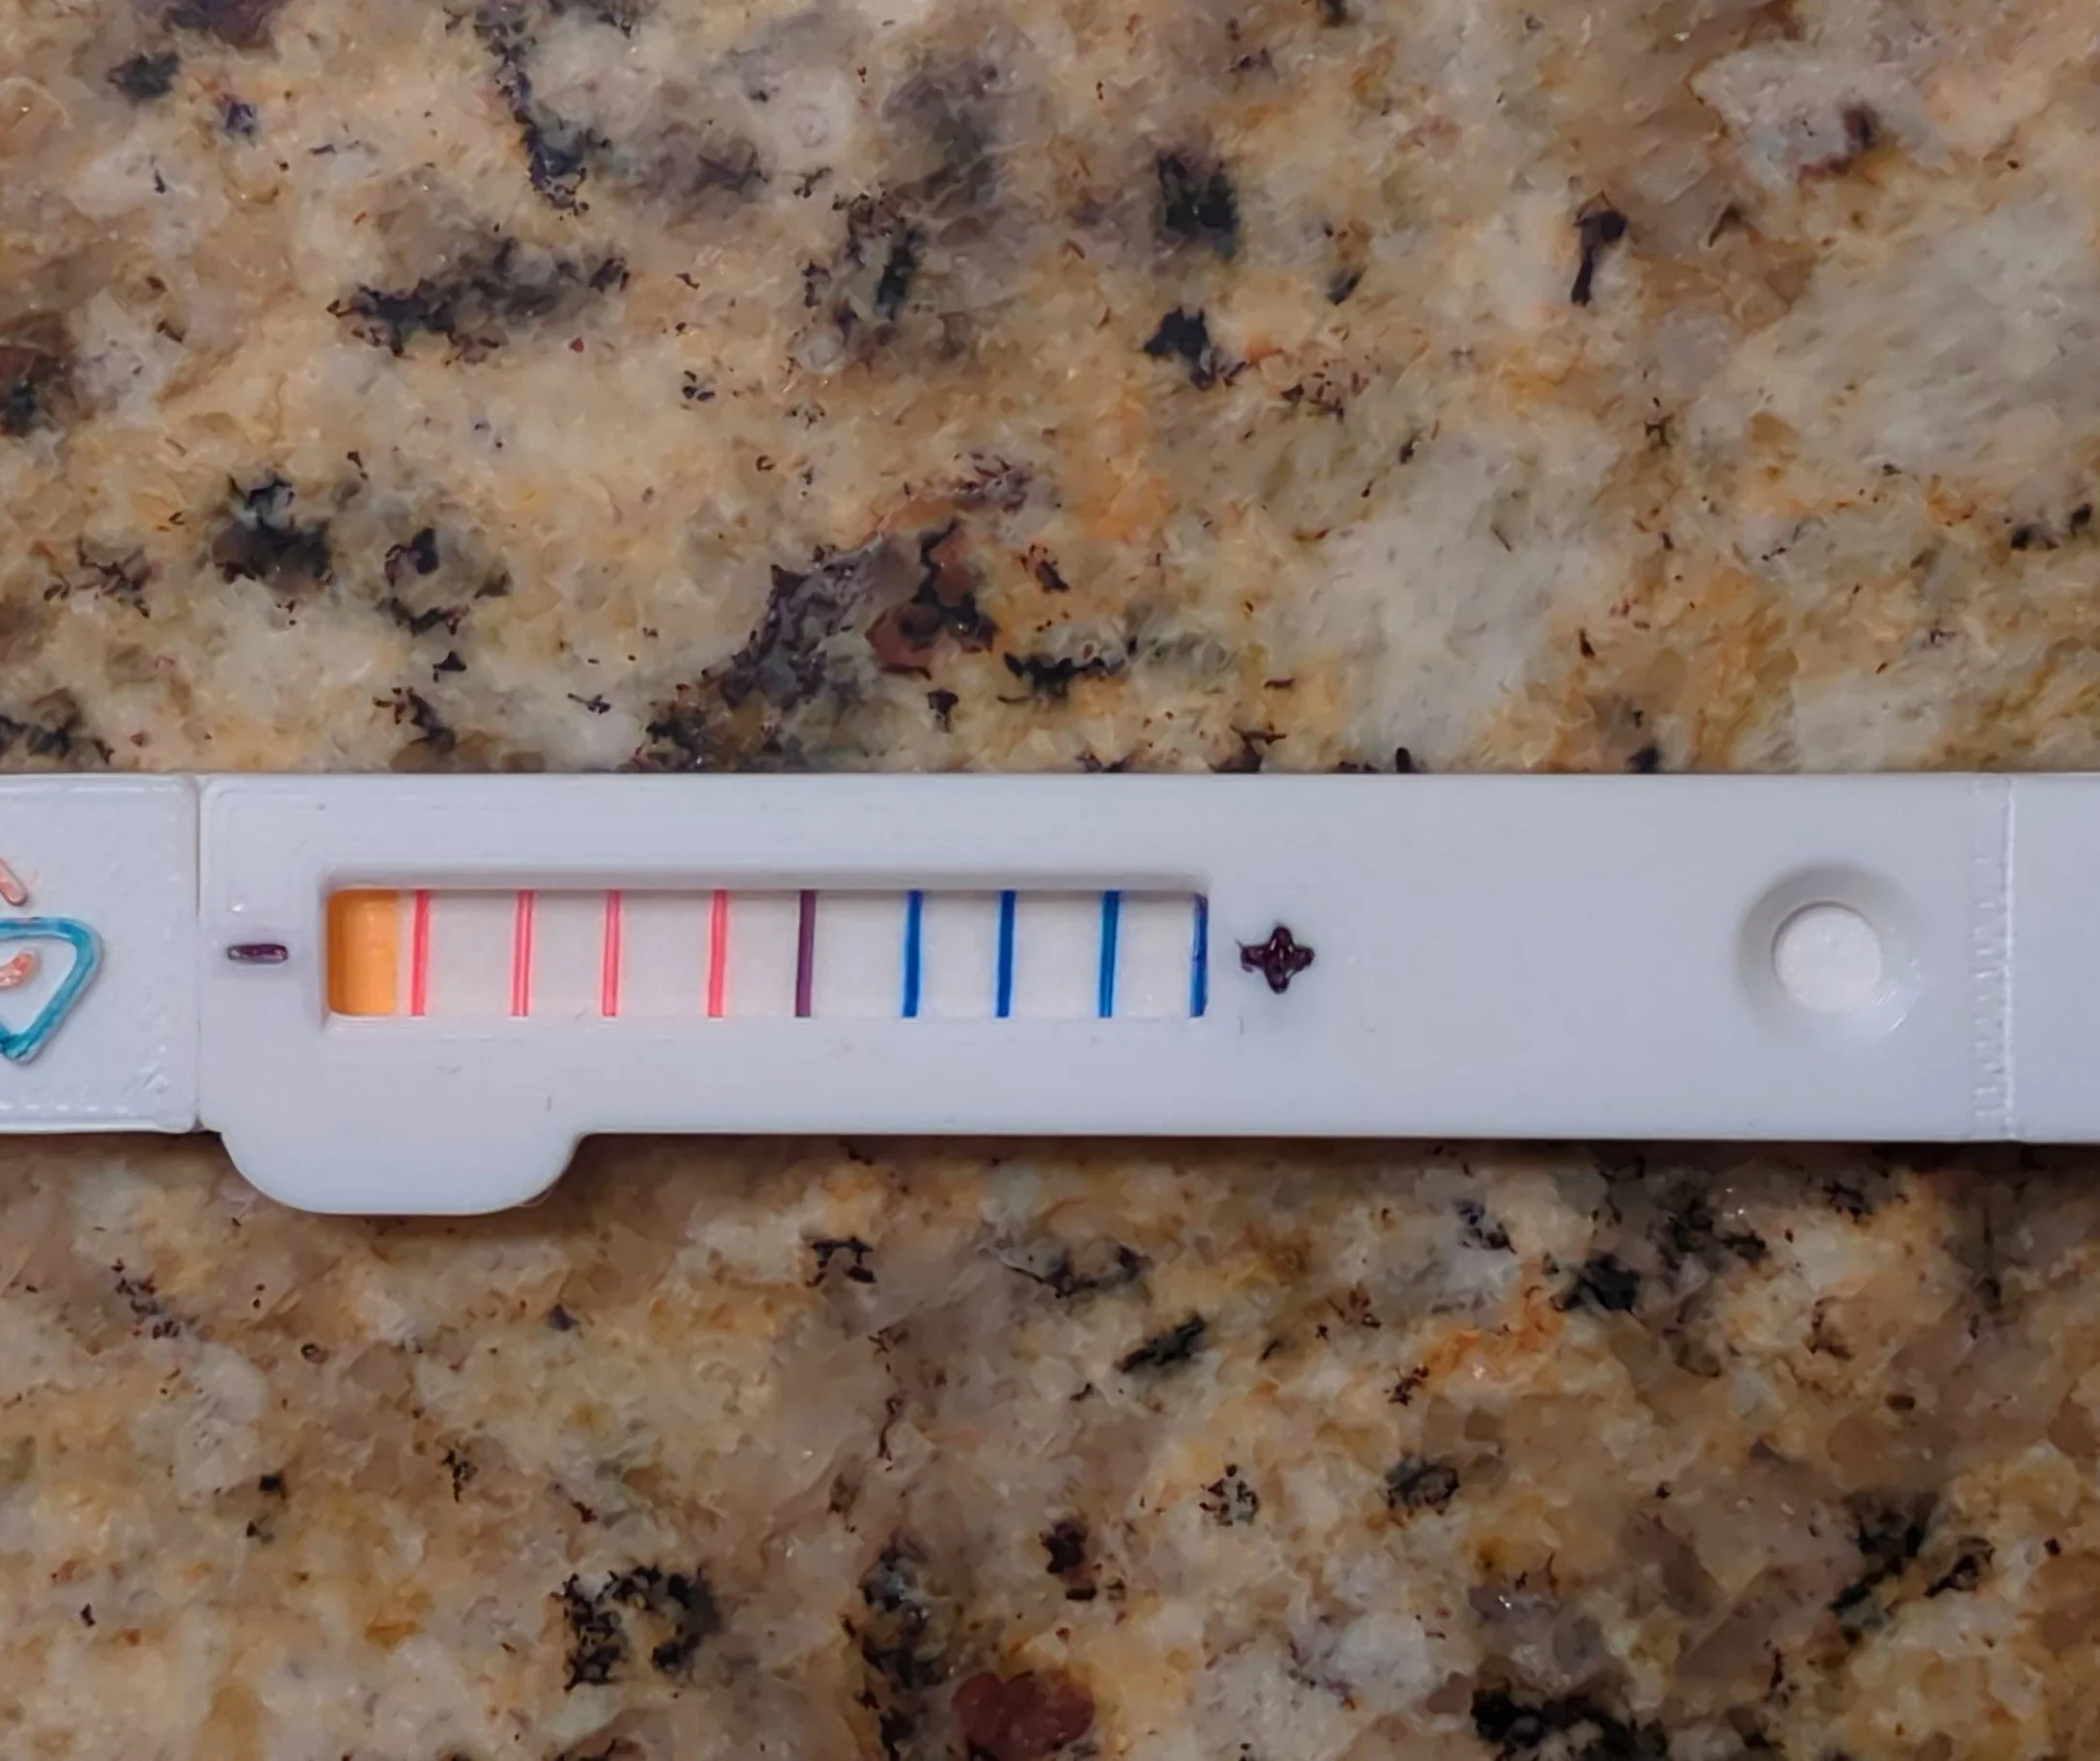
After test is run (shown below) Example reads as +3 where arrow is
Step 5
Orient your test with the circle well to the right as shown in the example.
Take a photo under good lighting. (for your own records)
Enter your result in the NEW app. (optional)
(The app will start automatically suggesting recommendations for how to steady your mood)
For additional methylation balancing information, see below.
Read the result

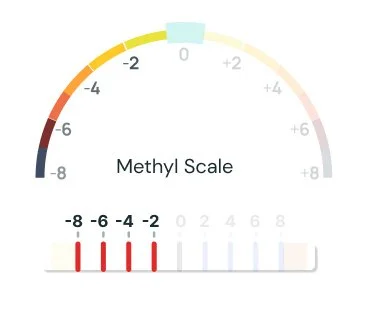
The result is where the white stops and the color begins. If the result isn't straight up and down, you may need to look at the surface area of the colored portion
Each blue line is +2 from the black 0 mark. Each red line is -2 from the black 0 mark.

For lifestyle and dietary recommendations, reach out to one of our certified practitioners.
Cleanup
After you’re done taking the test, it’s important to rinse your test components. This will keep future tests accurate.
Test Device Cleaning
Open the test device lid, and discard the test strip into the trash.
Rinse the inside of the test device, the bottom of the lid, and the top of the lid around the circular hole
Gently shake the device free of water and lay it out to dry
Device maintenance

Silicone Thimble and Dropper Cleaning
Rinse out your silicone thimble with water 3 times
Rinse out the dropper by filling the silicone thimble up full of water and then draw water up into the dropper
Each time dropper draws up water, flip it upside down so that it washes the entire inside of the bulb
Squirt the water from the dropper into the sink. (This is one wash)
Wash the dropper three times total
Shake out the thimble and dropper and lay them out to dry for next test
(Place dropper to dry in a area with plenty of light and/or low humidity or there may be some condensation still in the bulb by the next test)

Storage
The test strips are sensitive to light and air. Please keep them stored in their original container until you use them. Test strips should always be stored in a cool, dry environment and protected from light until use.
Over time a section of the test strips may darken and slightly bleed into the next section, but this is normal and does not change the accuracy of the results.
Test strip storage